Snow*Snowflakes*Snowman

Even though we don't get much snow here in South Texas, it's fun to talk about it and incorporate a snow week into our December lessons!


Letter: "S"

  Print coloring page HERE

Have the children first trace the letter with their finger. Next trace it with a crayon before coloring the page.

Color:  White

The best way to show preschoolers "white" is to use white chalk on black paper! For this lesson, ask them to draw a winter picture.


SCIENCE - What is snow?

Snow is a type of precipitation. Precipitation includes rain, sleet, and snow. When the weather is warm, water falls from the sky as rain. When the weather is cold, water becomes frozen and falls from the sky as snow.
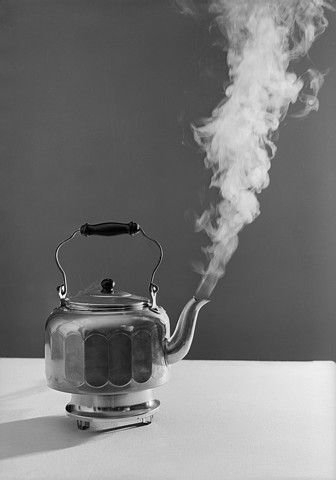
Water can be many different forms such as liquid, which is the water we drink or bathe in, frozen, which is the ice cubes we put in our drinks or snow, or steam, which is what floats up when we boil a pot of water or run a hot bath.

When water is "room temperature" it is liquid. When it is really cold it is ice or snow. When it is really hot it is steam.


EXPERIMENT!
If your child doesn't get to see snow much (like mine) it is fun to make your own by shaving ice cubes. A good way to make snow (really shaved ice) is to take a cardboard milk container and cut it in half and thoroughly clean it out. Fill it with water and let it freeze for 2 days. Then use a cheese grater to shave the ice. This will be as close to snow as you can get if you don't have access to the real thing.

If you have snow where you live, this is still a fun experiment. You are lucky that you can just go outside and do it!

Once you have your ice, allow the children to explore it. Touch it, how does it feel? What happens if you hold some in your hand? How does it change? Taste it. What does it taste like? Squeeze some together. Can you make a ball? Provide shovels or other items to manipulate it with.


STORY - "Mouse's First Snow" , "The Biggest, Best Snowman!" & "Snowflake Bently"


A story all about the fun this little mouse has playing in his first snow.


Product Details Also through Amazon: http://www.amazon.com/Biggest-Best-Snowman-Margery-Cuyler/dp/0590139223/ref=tmm_hrd_title_0?ie=UTF8&qid=1351256059&sr=1-1

This is a terrific story about a little girl who was told she is too small to do anything, but she shows everyone when she makes the biggest, best snowman!


Snowflake Bentley (Caldecott Medal Book)http://www.amazon.com/Snowflake-Bentley-Caldecott-Medal-Book/dp/0395861624

This is something a little different. Check this one out, it is really amazing and will capture your child's imagination!


POEM - "Winter Time Poem"
by Mary Ryer
 Icy fingers, icy toes, 
 Bright red cheeks and bright red nose. 
 Watch the snowflakes as they fall, 
 Try so hard to count them all. 
 Build a snowman way up high, 
 See if he can touch the sky. 
 Snow forts, snowballs, angels, too, 
 In the snow, so white and new. 
 Slip and slide and skate so fast. 
 Wintertime is here at last.


MATH - Snowflake Number & Pattern Matching

Pre-cut out a large number of different snowflakes from white paper. Make some large, some medium and some small.
For the numbers version, write numbers 1-5 on the large snowflakes. Help the children place the numbers in the correct order. Then ask them to count out the small snowflakes and place the correct number of them with the corresponding numbered snowflake. For example, place 5 small snowflakes with the large snowflak numbered "5".

For pattern matching, make a line of snowflakes in a pattern using the different sizes. For example, place 1 large, 1 small, 2 medium, 1 large in a line. Then have the children match the pattern you made with their own line of snowflakes.


CRAFT - Snowy Tree

Materials Needed:
Grey or Light Blue construction paper
Brown craft paint
Cotton Balls
Glue

Give each child a piece of paper. Coat their forearms and hands in the brown paint make an imprint on the paper. It will look like a tree! After allowing the tree to dry, ask them to add "snow" to their branches using the cotton and glue. They can also draw snow or other items in their winter picture.

**UPDATE - They actually used a cutout felt tree this year! It still came out super cute :)


MUSIC (and math!) - "Snowmen"

There were five little snowmen,  Each with scarf and woolly hat,  Out came the sun and melted one;  It's sad- But that was that!

 There were four little snowmen etc.

 There are no little snowmen,  Just scarves and woolly hats,  Sitting in a puddle  In a very wet  muddle;  It's sad -But that is that! 


COMMUNITY - Snow Plow Drivers

When the roads are covered in snow, people who drive Snow Plows come out to move the snow off of the roads to make it safer to drive on it. Snow and ice is very slippery and cars can slip too. Snow plow drivers are really helpful! They come out when it is really cold and windy to help make sure people are safe in their cars.

If you love the snow and driving big rigs, the job of a Snow Plow Driver is the one for you. As a Snow Plow Driver, you operate the truck that shovels snow off the road’s surface to make it safe for cars and trucks. This is seasonal work, but be prepared to be on call when Mother Nature unleashes her fury.


SNACK - Marshmallow Snowmen

Ingredients:
Mini marshmallows
Pretzel sticks
Raisins

Use the pretzel sticks to connect the mini marshmallows in order to make a head, body, and legs and the raisins can be their hands and feet. You can take it a step further and add a face and buttons using chocolate frosting.


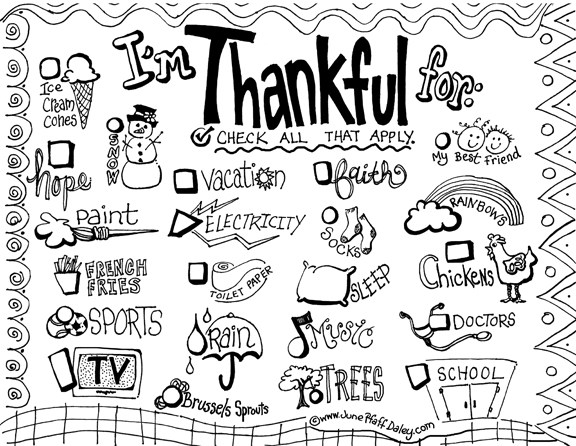
 COLORING - Kids playing in the Snow


winter coloring pages

Airplanes & Pilots (week after Thanksgiving)

This is a fun subject to use a "filler" between Thanksgiving and Christmas. Airplanes are a subject most kids can get in to and everyone needs a bit of a break between all the holiday madness!


A - Airplane  Print color sheet
Airplane Coloring Page Worksheet

P - Pilot   Print Alphabet Page
Letter P Pilot Color Poster


SHAPES - Squares

Print the color page. Have the children trace the squares first with their fingers, then with colors. Talk about the different sizes. Have the children color the largest squares a certain color. Then color the smallest squares another color. Count the largest, count the smallest. This can even be a fine motor skill activity if you have them cut out the squares. Once cut out, you can arrange them by size and make it a math activity!


Squares Game!

Collect a selection of different items in different shapes. In circle time, hold up the different items and ask the children to shout out when they see a square! Put the correct square answers in a different pile for each child who shouts out first. The child with the most squares in their pile at the end of the game gets a prize! You could give them a square graham cracker or some kind of square sticker.


COMMUNITY - Pilots

What is a Pilot's job?
Pilots fly airplanes and helicopters to do many jobs. Most pilots fly people and cargo from place to place. Some pilots test new planes, fight fires, do police work, or rescue people who are hurt or in danger.

To keep passengers safe during travel, pilots are responsible for numerous flight checks where they verify that the instruments, controls, engines, and other flight systems on their craft are functioning the way they should, checking off each flight system as they finish inspection.

In order to make this task more understandable for the children, make a plane out of boxes or styrofoam. Give them a copy of a Pre-Flight Checklist and have them check out the plane you provided.
example lesson worksheet where students perform a sample flight check

Once they have finished their pre-flight check, you can give them their "wings" to show that they are pilots! You can cut them from construction paper or use a sticker.


MATH - Colorful airplane sorting and patterning

Use stickers or pictures found on the internet or in magazines. Make sure there are 2 of each airplane and there are many different colors. It is a good idea to attach the airplanes onto index cards. Mix them all up in a pile and ask the children to select an airplane from the pile. Once they have put a plane in front of them on the table, ask them to find another plane from the pile that is the SAME. Repeat this a few times to match all the planes.

If you have a good enough selection, you can set out all the planes that are the same (ex: jets) and then just one plane which is different (ex: bi-plane). Ask the children to identify which is DIFFERENT.

Next, line up one set of airplanes on the table in a pattern. Ask the children to create the same pattern using their set of pictures.


 SCIENCE - Paper Airplanes (How do airplanes fly?)

This is a great book to read to help understand airplanes. Available on Amazon:

 Explain that air flowing over and under the wings is what causes the plane to fly. Show pictures of birds gliding, kites flying, and planes flying. It is the same effect for all of these that causes them all to fly. Bring a few large leaves to class. Hold the leaf high in the air and drop it. Explain that the air is why it drifts down so slowly. The leaf is like a wing. Allow the children to do the same experiment. (This is VERY basic, but they won't be able to understand much more at this age!)

Using the template, create a paper airplane. Demonstrate how it flies to the class. Allow the children to fly an airplane too!


MUSIC - I'm A Little Airplane

I'm a little airplane,
Now watch me fly!
Here are my instruments
From down low to up high.
First I get revved up.
Then I can fly,
Lifting off the runway
Up into the sky!

This is a fun song when you add the movements! You can add-lib pretty much anything and the kids will think it is so fun!


ART - Airplane Shape Craft
This is a great way to incorporate shapes into the airplane lesson!

Materials Needed:
Several different colors of construction paper
Glue sticks
Scissors

  Cut out several triangles from construction paper. One for the nose of the plane, 2 for the wings, and one for the tail. It is a good idea to have each part of the plane a diffrent color, so that explaining how to put it together will be easier. Then cut out a square for the body of the plane. Have the children create a plane using these shapes. Talk about the different shapes and how they come together to make a plane.


SNACK - Travel Snack Mix

When we travel, it is nice to have a healthy snack to munch on. Allow the children to help make their own travel snack for today. If it is possible, enjoy this snack outside or even at the park!

Ingredients:
Cheerios (any flavor, or a couple of flavors)
Raisins
Mini Marshmallows

Place each ingredient in a separate bowl and add a spoon. Give each child a small cup (best to have their names on them for name recognition) and allow them to scoop the ingredients into their cups as they want. This will also become a fine motor activity. They will be so proud of their mix and enjoy it that much more!

Thanksgiving! What are we thankful for?

For the week before and the couple of days leading up to the Thanksgiving Holiday we will focus on all things Thanksgiving. We will talk about what it means to be thankful, what we are thankful for, the first Thanksgiving, and all the usual symbols of Thanksgiving.


COLOR - Brown

LETTER - T for Turkey and Thanksgiving

Alphabet Letter T Turkey Poster and Coloring Page


STORY - What does it mean to be Thankful?

Being thankful can be a difficult concept to grasp as a young child.  Being thankful means to be happy that you have someone or something in your life. You could be thankful for your Mom and Dad. You could be thankful that your new friend moved closer to your house. You could be thankful that you get to visit your Grandparents. Talk about things that they are thankful for.

Read the story "The Thankful Book" which can be printed HERE. 

You can also read "Thanksgiving is for Giving Thanks!" It has awesome illustrations and focuses on giving thanks and the spirit of the holiday. Find it on Amazon: http://www.amazon.com/gp/product/0448422867/ref=oh_details_o00_s00_i03


CRAFT - Thankful Placemats

Materials Needed:

Lots of pictures from magazines or printed from Internet                         
Brown construction paper
Glue

Spread the pictures out on the table. Give the children their piece of brown paper. Tell them they are going to pick pictures of the things they are thankful for. Show them a picture and talk about it. Lets say it is a picture of a cat. If you have a cat and you are thankful for your cat, glue it to your paper. Make sure to have lots of different pictures so as to appeal to the many different children! It is a lot of fun to see what kinds of things the children pick.

Once they have completed their placemat, have each child talk about the things the chose. See if other children are thankful for similar things. These placemats can be laminated and actually used for Thanksgiving dinner!


HISTORY -  The First Thanksgiving                              

It is important to understand why we celebrate Thanksgiving here in America. It is not just about a big dinner and yummy desserts. The short story, "The First Thanksgiving" will help young children understand the true meaning behind this holiday.

You can also print out a book HERE that is a simple version for your kids. This book can also be colored!

It is helpful to really put emphasis on what these people were thankful for and why. Ask the children some questions after you have read the story. Who were the Pilgrims? Who were the Indians? What did the Pilgrims have to give up for a chance for a new and better life? What kinds of things did they want that would make their lives better? Once they arrived in the new world, were they scared?  Why? When the Indians came to help them, were they happy? How did the Indians help them? What kinds of things were the Pilgrims thankful for?


ART - Make an Indian Headress


Materials Needed:

Construction Paper
Craft feathers, beads, pom poms, etc
Colors or markers
Tape
Glue

This can be done in many ways. The simplest version is to cut out feathers from different colored construction paper and allow the children to color and decorate the feathers. Also cut out a head band and allow them to decorate this as well. Once they are decorated to their liking, tape or glue it all together.

A more elaborate version is to allow the children to decorate the headband with beads, pom poms, colors, etc and then attach real craft feather to the band. Either way, this is a fun activity.


ART & SHAPES - Pilgrim Shape Craft


I found this great idea at 2TeachingMommies blog. 

Materials Needed:

Construction paper in various colors
Scissors
Glue


 Cut out the shapes in the colors that you want. It is a great idea to go ahead a put one together before doing the craft with the children. Show them what it should look like. Talk about the different shapes and how they make up this pilgrim's body. This is a fun way to talk about many different shapes. It looks good hanging up in the classroom the week of Thanksgiving too!


Color the Cornucopia Worksheet  VOCABULARY & COLORING - What is a Cornucopia?

A Cornucopia is a horn shaped container. It is filled with a bunch of fruits and vegetables which are harvested (or picked) from the plants in the fall. These include pumpkins, corn, squash, grapes, apples, etc. It is also called the Horn of Plenty. It is a popular symbol of Fall and the Harvest around Thanksgiving.

Find the Cornucopia coloring page HERE!  Talk about the different colors of the many foods found in this Cornucopia.


COOKING - Thanksgiving Snack Mix
Make the snack mix and put it into sugar cones to symbolize the cornucopia. Then they can eat their creation for snack one day! Talk about each item as they add it to the bowl. (In order to make it easy for each child to participate, put portions of each ingredient into small cups. Allow the children to take turns adding ingredients)
  • Bugles, horn shaped snacks
  • Pretzels (that symbolize arms folded in thanks and pray)
  • Candy corn (see the gratitude tradition further on)
  • Circle shaped cereal (circle of unity)
  • Dried fruits (represent fruits available at harvest time)
  • Seeds or Peanuts (represent planting new crops)
  • Goldfish Crackers (fish was available and part of the first thanksgiving dinner)
Mix all together and portion out into sugar cones. Wrap in plastic wrap. If you are going to send them home with these, it is a good idea to print out a card that explains what each item symbolizes and attach to the treat so their parents can participate.


Gratitude Tradition
A great Thanksgiving idea for kids is to start a gratitude tradition. Did you know that when the pilgrims first came to America they had very little to eat that first winter? They were allotted 5 kernels of corn per day because food was so scarce. A wonderful tradition to start is handing out 5 candy corns to each person around the dinner table and each person has to think of 5 things they are grateful for. It is a great reminder that we are all blessed with lots of food and many wonderful things to be grateful for.


BIBLE - Thanksgiving Prayer
Here is a simple but effective prayer about being thankful:

Thank you God for all that grows,
thank you for the sky’s rainbows,
thank you for the stars that shine,
thank you for these friends of mine,
thank you for the moon and sun,
thank you God for all you’ve done!


COUNTING/MATH - Turkey Feather Counting

Print and cut out the Turkey Template for each child. Write a large number 5 on the turkey's tummy. You can either use the feather template and cut them out or use craft feathers.

Have the children count out 5 feathers. Have them glue the feathers to the turkey in the appropriate places. Talk about the number 5.


Nutrition & Health Week (1st week November)


November is Nutrition and Health Month so we will use this week to focus on how to be healthy and proper nutrition.

ALL ABOUT ME!

SCIENCE -  Body Parts 

In circle time, have the children stand up. Begin by asking the children about their bodies. Where is your nose? Where is your tummy? Go through all the big major body parts. Next begin to ask them where the body part is that they eat with? Where is the body part that they walk on? Have them point and make it fun!


MUSIC - Head, shoulders, knees and toes!
As you sing this, point at each of the body parts. It is an educational and physical song.
Head, shoulders, knees and toes, knees and toes
My eyes, my ears, my mouth my nose
Head, shoulders, knees and toes, knees and toes!


PHYSICAL FITNESS

MATH - Physical Fitness Math Game
Fitness and math concepts can be combined during this simple and fun game for preschoolers:
  1. Gather flash cards printed with the numbers 1 through 10, and shuffle them into a pile.
  2. Allow the children to take turns drawing a number from the pile. Ask each child to name the number out loud, and then perform a corresponding number of short exercises. For example, if a student draws the number 6, say, "Touch your toes six times". Suggestions for exercises can include walking in a circle around a chair, doing jumping jacks, or hopping up and down.

GROSS MOTOR - Obstacle Course

Set up an obstacle course outside or in a large room. Use tape on the floor to make a balance beam. Place pillows to jump over.  Set up chairs they have to crawl under. Make a crepe paper section that they can tear through if not careful. Make it fun, but keep it safe. Make it a race. Or tell them if they can make it through without falling down or knocking any obstacles over they win a prize like a sticker.


http://www.choosemyplate.gov/images/MyPlateImages/JPG/myplate_green.jpg


NUTRITION - Food Plate (the new food pyramid)


Discuss the food groups. Fruits are strawberries, bananas, apples, oranges, pears.  Vegetables are green beans, carrots, spinach, broccoli.  Grains are cereals, breads, bagels, pastas.  Protein is chicken, turkey, beef, tuna.  Dairy is milk, yogurt, cheese.

Use the graphics by clicking this link: my plate graphic to print a copy of the plate. Using either pictures from magazines or play food, have the children add food items to the plate in the correct spaces. Talk about how having a balance these food groups are how we stay healthy and strong.

It is important to talk about "all the time foods" and "sometimes foods". All the time foods are those found on the My Plate or Food Pyramid. sometimes foods are those goodies that we can enjoy sometimes, such as candy, cookies, ice cream, etc. Those items are not found on the Plate because they are not full of nutrition. They are tasty, but should only be eaten as a special treat on occasion.


COMMUNITY -  Nurses

"N" is for Nurse!   Print coloring page HERE

Trace letter N's in upper and lower case with your finger as you also sound out the letter.  Invite the children to do the same on their coloring page (first presentation) or handwriting practice worksheet.   


What does a Nurse do?

Nurses, also called registered nurses or RNs, take care of sick and injured people. They give people medicine. They treat wounds. And they give emotional support to patients and their families.

Nurses ask patients about their symptoms and keep detailed records. They watch for signs that people are sick. Then, nurses help doctors examine and treat patients.

Some nurses help to give tests to find out why people are sick. Some also do lab work to get test results.

Nurses also teach people how to take care of themselves and their families. Some nurses teach people about diet and exercise and how to follow doctors' instructions. Some nurses run clinics and immunization centers.


HEALTH - Handwashing & Germs

Start your talk or circle time about germs with a great poem.

Don’t forget to give it a creepy low voice. It will really catch their attention.
Germs, Germs everywhere
Even on your teddy bear
Germs, Germs everywhere
Even where you can’t stare
Germs, Germs in our hair
But even when they’re out of
sight, they’re are so many ways
for us to fight…Germs


A Fun Demonstration on how a Cough or Sneeze Spreads.

Take a hand full of pompoms. At the end of the germ poem pretend to sneeze or cough and bring the handful of pompoms up close to your mouth. Then toss the pompoms lightly from your hand. These fun little pompoms spread out just like the germs from a sneeze or cough. A great demonstration on why we need to cover our mouth when we cough or sneeze.


How do we fight Germs? Germs are scared away with soap and water! Washing our hands will help to keep us healthy and germ free.

How to demonstrate "scaring away" those pesky Germs that may be on our hands.

Mix together some baby oil and some cinnamon. Add just enough cinnamon that you can see the small specs in the oil. Gather the children and smear a small amount of the oil mixture onto one of their hands. Have them look closely to see the "germs" in the "dirt" on them. Now, how to remove these Germs? Handwashing, of course! Discuss the proper steps for washing their hands and have each child wash their hands using these steps. Demonstrate how this action will remove the nasty Germs from their hands. 


Hand washing poster