Water is the most abundant element on the planet Earth! That means that there is more water than anything else. All living things need water to live. Plants drink it, animals who live on the land drink it, and animals who live IN the water need it to be able to move and breathe.
What kinds of things do you use water for?
1. Drinking
2. Bathing
3. Washing dishes
4. Washing clothes
5. Flushing the potty
6. Brushing our teeth
7. Watering our gardens
8. Keeping our pet fish in
9. _______________
Imagine if there was no water! Water is very special because it can come in different forms, such as ice and steam. It is also very powerful! It can carve canyons. Watch this short video about how water can form canyons in the rocks:
Water can also be very gentle. When it falls as rain, it will gently water the plants, trees and flowers. Water can be a helpful tool. We can use it to power items and to put out fires.
Water is very important!
SCRIPTURE
Genesis 1:6-10
God creates water

Use this awesome lesson from Ministry To Children for your bible lesson!
SCIENCE
Carving Canyons
This is a powerful lesson about the power of water! We are going to perform an experiment which will demonstrate how the power of water can change the way the Earth looks.
Materials Needed:
Play Sand
Pebbles
Fresh leaves
Large plastic tub
Water
This will take some prep! In your tub (I find that the plastic tubs sold in the washing dishes section at Wal-mart work great and they are only a couple of bucks) place a layer of pebbles. Pour play sand on top. It should be a good sized pile. You will need room on top to pour water. Also, make sure there is a slope downward on one end for runoff and a small amount of room at that end for water collection. You can also poke a small hole under that collection area for drainage if you wish. Now place some pebbles in random locations around your sand hill. Also drop some leaves on top. Carefully splash a little water on the sand to help it stick together and allow it to dry.
To begin, remind the kiddos about how water can carve canyons. You can re-watch the video from the circle time section. Gather the kids around the tub and explain that they should pretend that this is a hill side in the country. Ask them what they think will happen if it starts to rain. Allow them to come up with their hypothesis and discuss the reasons they think what they do. Begin to slowly pour water at the high end of the sand hill and watch it run down. You should be able to see some results immediately! Continue to pour the water and watch it run down the hill, carving deeper into the sand as it goes.
Explain what is happening. As the water travels down the hill, little bits of sand, leaves and rocks get carried away in that water. Eventually, a canyon will be formed. In a hill made of rock this takes much longer, hundreds and thousands of years, since the rock is a much harder substance than the sand in your hill. It works the same way, though!

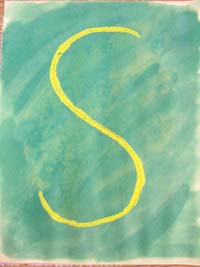
READING - Name Recognition
Sticker Writing
For each child, you will need:
A piece of paper with their name written on it in large letters
Star stickers
The idea of this is to get them used to seeing their names spelled out and even give them the chance to "spell" it themselves. Provide the kids with their paper and enough star stickers to cover all their letters. I like the foil stars for this because the stars make them feel special and also they are dirt cheap! This is also great for fine motor skill development. Demonstrate how to place the stickers on the letters in their names in order to "write" their names with the stars. Once they all have their names completed, ask each child to spell their names out loud for everyone.

MATH
Water Drop Counting
Print out the 2 worksheets HERE. The first page is a raindrop with a number written on it. The second page has raindrops with different numbers of stars on them which correspond to the written numbers. You can have them do this in 2 ways. Either give them the sheet with the written numbers on them and cut out the drops with the stars on them and have them match the number of stars to the written numbers OR you can cut out the written numbers and have them match those to the numbers of stars.
A great way to be able to use these again and again is to laminate them and use Velcro dots to attach them to each other!

Goldfish Counting
Materials Needed:
Small, white styrofoam cups OR muffin liners
Goldfish crackers
Black sharpie marker
Muffin tin
Inside the bottom of each cup or liner, write the numbers 1 - 12. Use a little bit of tape to stick each cup to the muffin tin cups. You can put them in numerical order or mix them up. This depends on what kind of skill level your kids have. Provide the kids with crackers. The goal is to place the corresponding number of fish into the cups. Great for counting practice!
(Fish swim in water so that's how I am connecting them!)

ACTIVITY
Blowing Bubbles
This is very simple and just plain fun! Provide each kid with a water bottle that is only about ½ full. Insert a straw and allow them to blow bubbles! Water can be fun.
FINE/GROSS MOTOR
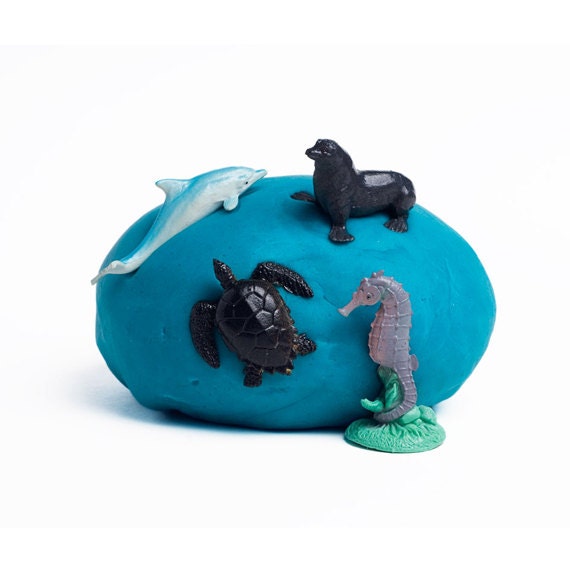
Fine - Playdough
Get or make some blue playdough and have the kids make raindrops, a river, a swimming pool or whatever they like with water!
Gross - Water Balloon Spoon Races
Fill up some water balloons with water. Make them small so this won't be too difficult for the kiddos. Provide them with spoons. Make a race track for them outside. I like to use empty cereal boxes for my track markers. You can make this a relay-type race where 2 kids race one direction and tag 2 more at the end to run back again OR you can just have them all race together. The idea is to complete the race without dropping their water balloons which are balanced on a spoon. If they drop it they will incur a penalty such as having to return to the start and begin again or just have to stop to pick it up before they can start again. You can really do what you want with this and it will be fun! Great for developing hand-eye coordination and patience.

BOOKS

A great story to explain what happens in water's great journey!

Explains the water cycle in the perfect way for young children to understand. A great book to read aloud!
MUSIC
The Itsy Bitsy Spider
"The itsy bitsy spider went up the water spout
Down came the rain and washed the spider out
Up came the sun and dried up all the rain
And the itsy bitsy spider went up the spout again"
ART/CRAFT
Art - Kool-Aid Art
You can use Kool-Aid drink mix to make watercolors!

Materials Needed:
Paper
Small cups for the "paint"
A couple of different flavors of Kool-Aid
Q-Tips or Paint brushes
Water!
It is fun to allow the kids to help make the paint. Place the drink mix into a cup and add a small amount of water. You want it to remain somewhat thick, if it is too thin you won't be able to see the color very well.
Once the paint is made, allow the kids to paint a water themed picture using colored water!
Craft - Rain Globes
Materials Needed:
Small baby food jars with lids
Glitter
Small plastic figures (you can get these at craft stores)
Super glue
Rain drop stickers
Water!
Allow the kids to choose the figure they want in their globe. They will need help to glue it to the inside of the lid. While those dry, give the kids a small container of water and let them fill their jar. They will then need to add a spoonful of glitter to the water. Screw the lid on the jar and then turn the jar upside down. The kids should decorate their jars with some rain drop stickers. Shake the jars and it will look like sparkly rain!

COOKING
Jello - made with Water!
Just to make sure it follows with our lesson you should make blue Jello!
You should start this cooking project early in the day so that it will be ready in time for snack. Depending on how many kids you have, you may want to make several separate bowls of the Jello so it will set up in good time. Allow one child to pour the mix into the bowl and another to add the water. Since the water will be hot, use caution here.
When you are eating it, you can talk about how you are eating something that was made with water!