American Heart Month - February


It seems very appropriate to celebrate the heart this month! Our heart health is very important. Let's do some fun activities that will help kids learn how to take care of their hearts. This lesson plan is a great way to break away from the Valentine's Day norm while keeping with the heart theme!


CIRCLE TIME

Begin by talking about your heart. Our heart is the strongest muscle in our body! This is the organ that pumps our blood through our bodies. In order for our heart to pump blood correctly, it must be a healthy heart! We can take steps to make sure our heart stays healthy.

1. Get lots of exercise. When we exercise, it makes our heart work harder. This is good for our heart and keeps it healthy.

2. Eat heart healthy foods. Usually, the brighter in color the better! Foods that are great for your heart include salmon, oatmeal, black beans, almonds & walnuts, tuna, blueberries, spinach, broccoli, sweet potatoes, asparagus, oranges, tomatoes and papaya. Try to include as many of these types of foods in your daily diet. Only eat "junk food", such as cookies, candy, cheeseburgers, and chips, occasionally. I like to call the healthy foods "all the time foods" and the junk foods "sometimes foods".

You can review more information on the American Heart Association's website. Click HERE to check it out.


Wear Red Day is the first Friday in February. Everyone should wear something red on this day to promote heart healthy habits!


Circle Time Activity:

Find pictures of heart healthy foods such as brightly colored fruits and vegetables, salmon and tuna, oatmeal, yogurt, almond and walnuts, etc. Also find pictures of junk foods, particularly things like greasy fried chicken, cheeseburgers, French fries, etc.

Draw a big red heart with a smiley face on one paper and a big black heart with a frown on another paper. Post those on the wall near your circle time place.

After you discuss the good and bad foods, ask the kids if the food you are showing them is heart healthy or bad for your heart. Go through each item and talk about it.


SCIENCE/CRAFT

Make your own stethoscope and listen to each other's heart!

You can make a simple stethoscope! You will need:
Paper towel tubes
Small funnels
Duct tape
Medium balloons
Scissors


Duct tape the funnel as tightly as you can to the paper towel tube with the big end facing out. Cut the balloon's end off and pull tightly over the top of the big end of the funnel. This creates a "tympanic membrane" which will help to amplify or make the sound louder.

Place the balloon end against the chest of one of the kids and place the open end of the paper towel tube to your ear and listen for their heartbeat. Of course, you can do this activity without using your home made stethoscope if you want!

What do you hear? How does the heart sound? How many beats do you hear? Have the kids reproduce the sound the are hearing. What do they think the heart is doing? Why are there 2 beats?

Now have the kids do some jumping around. Get those heart rates up a bit. Now listen to the hearts again. What changed? Why do they think that happened?

Discuss what is happening inside their bodies.

Watch this video for a great explanation: http://kidshealth.org/kid/htbw/CSmovie.html


GROSS MOTOR

Happy Heart Says:

Just like "Simon Says". Line the kids up. Tell them they need to listen closely to the directions. You will say "Happy Heart Says" and then give them an exercise such as jumping up and down. Make sure they listen, if you don't say "Happy Heart Says" then they will have to sit out. You may want to make it to where they sit out for 2 turns and then get back in the game. Get them moving!


FINE MOTOR
 
Find the Hearts
 
Get some heart stickers. Pour rice (you can use colored rice if you wish) into a large tub. Place stickers in the rice. Have the kids use tongs or tweezers to pull the stickers out of the rice. Let them keep what they find!


MATH

Math Scavenger Hunt

You Will Need:
Index Cards
Sheets of Paper
Markers
Prizes

The index cards will be the clues. The sheets of paper will be the markers for the next clue. The idea is to make them do some simple addition in order to get to the next clue marker.

Draw some simple addition problems (also do some subtraction if the kids are ready for that) on index cards. I like to write out the number problem and then also include a representation of the problem in dots. For example I would write 5 + 2 = at the top in big print. Then I would draw 5 dots + 2 dots = at the bottom in smaller print. This helps them to work the problem. Write the answers on the papers. So the sheet of paper that would correspond to the above index card would have a big 7 written on it.

Place the papers with the answers in random places around the room. Place the next index card with that answer sheet. Once they have found that correct answer, they can solve the next index card problem and move on to the next answer sheet. For completing the hunt, there should be some kind of prize. Examples of prizes are valentine pencils, heart sunglasses from the dollar store, a little baggie of Kashi Heart to Heart cereal...


ART

Torn Paper Hearts

You Will Need:
Red, Pink, White, Purple Construction Paper
Glue (best is school glue, put some in a little bowl for the younger kids)


Cut the white paper into a large heart. Provide the other colors of paper and glue to the kids. Allow the kids to tear the paper into pieces, which they will then glue all over the white heart. The end results are pretty!

These look awesome hanging on the walls!


READING


"Night and day, whether you're asleep or awake, your heart is always beating. Read and find out how your heart works and how to keep it healthy."

On Amazon:  http://www.amazon.com/gp/product/0064451399/ref=s9_simh_gw_p14_d0_i2?pf_rd_m=ATVPDKIKX0DER&pf_rd_s=desktop-1&pf_rd_r=0R618EZPR799PMP0DQMQ&pf_rd_t=36701&pf_rd_p=1970559082&pf_rd_i=desktop
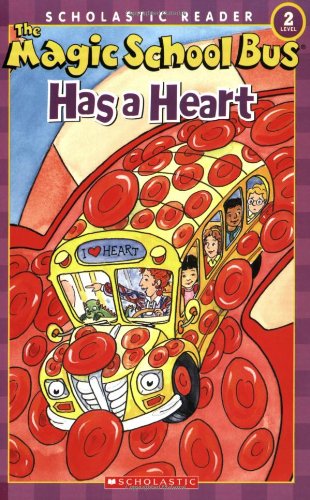


"Ms. Frizzle's class is learning about the heart. They get in the Magic School Bus because they are going to see a movie. But they find themselves on a heart-pounding adventure!"

On Amazon:  http://www.amazon.com/Magic-School-Heart-Scholastic-Reader/dp/0439684021


MUSIC

My Heart - by Jennifer Fixman

Follow the link for the lyrics and tune!  http://www.songsforteaching.com/jennyfixmanedutunes/myheart.htm


COOKING

Heart Muffins

These muffins are tasty and heart healthy! They are high in protein and low in sugar.

Ingredients:
2 1/4 Cups All-Purpose Flour
2 Teaspoons Baking Powder
1/2 Teaspoon Salt
2/3 Cup Brown Sugar
6 Tablespoons Butter, melted and cooled
1/2 Cup Chunky Peanut Butter (you can use smooth, that's fine)
2 Eggs
1 Cup Milk
3/4 Cup Mini Semi-Sweet Chocolate Chips


Directions:
In a large mixing bowl, whisk together the flour, baking powder, salt and brown sugar. In a medium mixing bowl, whisk together the butter, peanut butter, eggs, and milk until smooth. (if the peanut butter is in clumps within the liquid that is fine, it will all work out in the end) Pour liquid mixture into flour mixture and mix until just combined. Fold in chocolate chips. In a paper lined muffin tin, scoop 3 tablespoon size scoops into each muffin cup (I used my cookie scoop). Bake in a pre-heated 375 degree oven for 17-20 minutes or until a toothpick inserted in the center comes out clean.

**To make them heart shaped, place a marble between the muffin cup and the paper liner before baking.


Activities for ages 18 months to 2½!


Shape Planes


Click the link to find out how to make these super cute (and easy) shape planes...

http://nothingbutmonkeybusiness.blogspot.com/2012/10/airplanes-pilots-week-after-thanksgiving.html


Snowflake Letters


You can help toddlers learn about letters using snowflake stickers...click the link


Snowy Hand Trees


Easy craft using their handprints and cotton balls...

http://nothingbutmonkeybusiness.blogspot.com/2012/10/snowsnowflakessnowman-1st-week-of.html


Snow Bunnies Craft


Another easy craft using cotton balls. Just click the link and print the template to get started!

http://nothingbutmonkeybusiness.blogspot.com/2012/11/winter-cold-weather-animals-december-wk.html


Toilet Roll Heart Stamping


Check out this adorable and easy craft!
http://nothingbutmonkeybusiness.blogspot.com/2013_01_01_archive.html


Lots of Weather Crafts & Activities


Too many fun things to do for kids of all ages!
http://nothingbutmonkeybusiness.blogspot.com/2013/01/weather-and-seasons-jan-21-25.html


Painting with Cars

 
Using car wheels to paint is awfully fun!

http://nothingbutmonkeybusiness.blogspot.com/2013/01/transportation-january-21-25.html


Firefighter Pretend Play

fireman hat


Easily make these "hats" and pretend to be fire fighters all day long!
http://nothingbutmonkeybusiness.blogspot.com/2013/01/firefighters-and-fire-safety-feb-4-8.html


Egg Carton Color Sorter


Make this for your toddler and let them practice sorting by color...so fun!
http://nothingbutmonkeybusiness.blogspot.com/2013/02/5-senses-feb-18-22.html


Ice Cube Painting


Even the kids that still put everything in their mouths can paint like this!
http://nothingbutmonkeybusiness.blogspot.com/2013/03/i-can-week-confidence-building-april-1-5.html


Teeth Counting Playdough Mats


Use white playdough to add teeth to the face...counting and playdough fun!
http://nothingbutmonkeybusiness.blogspot.com/2013/04/teeth-and-dental-health-may-6-10.html


Foot Flowers Craft


These are fun to make anytime!
http://nothingbutmonkeybusiness.blogspot.com/2013/07/gardening-growing-plants-july-22-26.html


Police Car Shape Craft


Use this template to make a police car using simple shapes.
http://nothingbutmonkeybusiness.blogspot.com/2013/01/safety-law-enforcement-2nd-week-january.html


And keep looking through the other posts! There are activities for toddlers on almost every page.

7 Fun Fall Crafts for Kids!


Paper Plate Owls!


From FunFamilyCrafts.com
 
 
You Will Need:
 
Paper Plates
Brown Paint
Paintbrushes
Yellow, Orange, Black and White Construction Paper
Glue Sticks
Scissors
 
 
Directions:
 
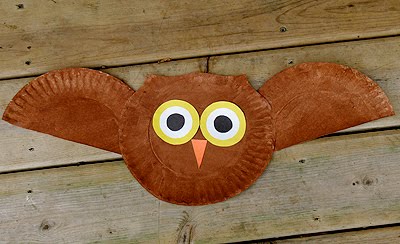
Cut one paper plate in half. You will need two large orange circles, 2 medium white circles and 2 small black circles. You also need an orange triangle. You can have these pre-cut for the younger kids or include cutting them out as part of the craft for the older kids. Paint one full plate and 2 halves brown. Once dry, Glue the halves to the sides of the full plate to make wings. They can be up, like in the picture, for a flying owl or down against the sides of the full plate for an owl who is sitting on a branch. Glue the large yellow circles in the top middle portion of the inner circle of the full plate. They should be touching in the middle. Then glue the white circles in the middle of the yellow and the black circles in the middle of the white.  Glue the orange triangle, point down, below the eyes.
 
This is a fun craft and fairly easy for kids of all ages to do!


Fingerprint Fall Trees


You Will Need:

White Paper
Brown Paint (tempura works best for this)
Orange Paint
Yellow Paint
Green Paint
Paint Tray
Baby Wipes


Directions:

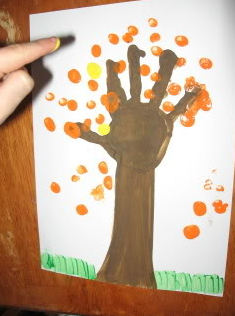
Begin by coating the child's forearm and hand in brown paint. Press the painty hand onto the white paper to make the tree. They can then add the fall leaves by dipping their fingers in the orange and yellow paint and pressing onto the limbs of their "tree". Add grass to the bottom.


Leaf People


You Will Need:
 
 
Leaves of various sizes, shapes and colors
     (you could take a nature walk to collect them!)
Googly Eyes
Glue
Markers
Paper
 
 
Directions:
 
Place the leaves in a bowl and allow the children to select the leaves they wish to make their people out of. Provide paper, glue, markers and eyes and ask them to make people. Easy!


Painted Pumpkins


You Will Need:

Pumpkins
Tempura Paints
Paintbrushes


Directions:

This is so easy! Paint the pumpkins. You can paint faces, scenes or even just throw paint all over it! It all works and is really fun.


Fall Tissue Paper Wreaths


You Will Need:
 
Paper Plates
Scissors
Glue
Tissue Paper, fall colors and cut into 1" x 1" squares
 
**Optional- acorns, fake fall leaves, etc
 
 
Directions:
 
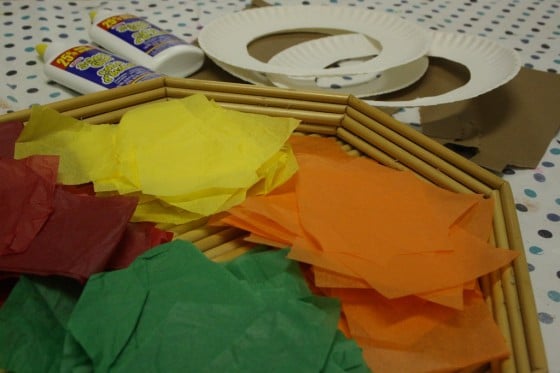
Cut the inner circle out of the paper plates to make a ring. Provide glue, tissue paper, and any extras for the kids. If you scrunch up the paper before gluing, it makes a cool effect. You can leave the paper flat, if you prefer.


Squash Monsters
 
Borrowed from...


You Will Need:

Autumn Squashes
Googley Eyes
Pipe Cleaners
Paint
Sticks
Glue
Scissors
Paint Brushes
Whatever else you want to use!


Directions:

Allow the kids to pick out a squash and then create a monster using the items provided!


Hand & Foot Turkeys


You Will Need:

Brown, Orange, Red & Yellow Construction Paper
Scissors
Glue
Googley Eyes
Pencils


Directions:

Trace each of the child's feet on the brown paper. Trace their hands on orange, red and yellow paper. Have the child cut them all out or cut them out for them. You will also need 2 turkey feet, a beak and a wattle (the fleshy skin that hangs down below a turkey's beak). Once everything is cut out, glue the feet with the heels up and the feet crossed over each other (shown above). Glue on some eyes, the beak and a wattle. Add the feet. Then add the hand "feathers" behind the turkey body. Cute!


SUMMER PRE-K PACKET


Summer can seem pretty daunting to many parents. There is a bunch of time to fill and only so many trips to the park or the mall you can handle. You don't want to just plop the kids down in front of Disney Jr. for hours on end. So what to do?
 
To help fill the time with some super fun LEARNING activities, I created this Summer Fun Packet! The activities in this packet are so fun, neither you nor the kiddos will feel like they are in a boring classroom. They will be asking you, "What are we going to be doing today?" And you will have a plan, safe in the knowledge that you will all enjoy yourselves.
 
The activities in this packet are geared toward 3 to 6 year olds, but can be modified for younger or even older children.
 
Click on the below link to download the packet. It includes templates, game pieces, and checklists. Everything you should need to have a fun learning summer with your pre-k kids.
 
Have fun all summer!


You can also follow this link: http://nothingbutmonkeybusiness.blogspot.com/p/weekend-fun-what-to-do-with-your-kids.html   to my "15 Easy Weekend Activities" page which has even more fun things for your family to do.

11 Fun Easter Crafts for Kids! (Includes Christian based crafts)

I thought it might be helpful to you if I put together a nice list of fun Easter crafts that you can do with young kids! I hope you have fun doing them...


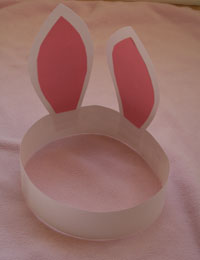
Easter Bunny Ears and Tails

For the Ears You Will Need:

Construction paper or cardstock (in the colors of your choice)
Tape
Glue
Scissors

(You can also provide stickers, markers, glitter, cotton balls, or anything else you would like to decorate the ears with)

Measure the circumference of the child's head using string or measuring tape. Measure around their head just above the ears. You want this to be snug but not tight. Using your measurement, cut a strip of the paper about 2 inches wide. You may need to tape 2 pieces together to get the length you need. Tape the head piece together so it will fit on the child's head.

Cut 2 ear-shaped pieces. Make them tall, kids love that! You also need 2 smaller ear-shaped pieces in another color, such as pink, for the inside of the ears.

Have the kids glue the inside of the ears to the big ears. Allow to dry a few minutes.

Show the kids how to glue their ears to the head piece. I find it looks best if they are glued to the inside on the back so the ears will stick up in the back of their heads when they wear them.

Now you can leave them as-is or they can decorate them further using whatever materials you provided them!


For the Tails You Will Need:

White construction paper
Cotton Balls
Glue
String

Cut out a "puffy cloud" shape from the paper. Allow the kids to glue cotton balls to the cloud shape and dry a few minutes. Measure the string around the kid's waist so that it is not too tight but has enough length to be tied in a bow. Glue the tail to the string. Once dry, tie around their waist so that the tail rests on their hiney!


NOW for the fun part! Dress the kids up and let them "hop on down the bunny trail"!!


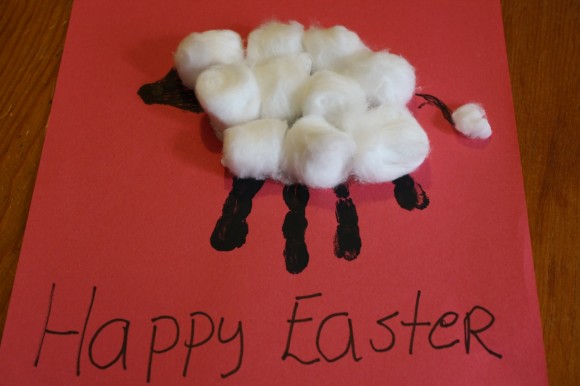
Handprint & Cotton Ball Lambs

You Will Need:

Black paper
Cotton balls
Glue  (school)
Pencils
Scissors

Trace the kid's hand onto the black paper using the pencil. Cut it out. Provide cotton balls and glue and allow the kids to glue lots of cuddly fur to their lamb. The thumb will be the lamb's head and the fingers are the legs. Once their lamb is dry you can add a face to the tip of the thumb.

You can then glue the lamb to another piece of paper and print "Happy Easter" on the bottom. These look great on the refrigerator!


Sun Catcher Easter Eggs

You Will Need:

Construction Paper
Lots of tissue paper squares
Wax paper
Glue
Scissors


Begin by cutting out a large egg shape from the paper. Then cut out the inside of the egg leaving about an inch of paper.

Glue wax paper on the back of the egg to completely cover the space.

Provide glue and the tissue paper to the kids. The kids should glue many different colors of the tissue paper to the wax paper, covering as much of the space as they can.

Once these dry, they are so pretty when you hang them on the window!

Image borrowed from sewcountrychick.com


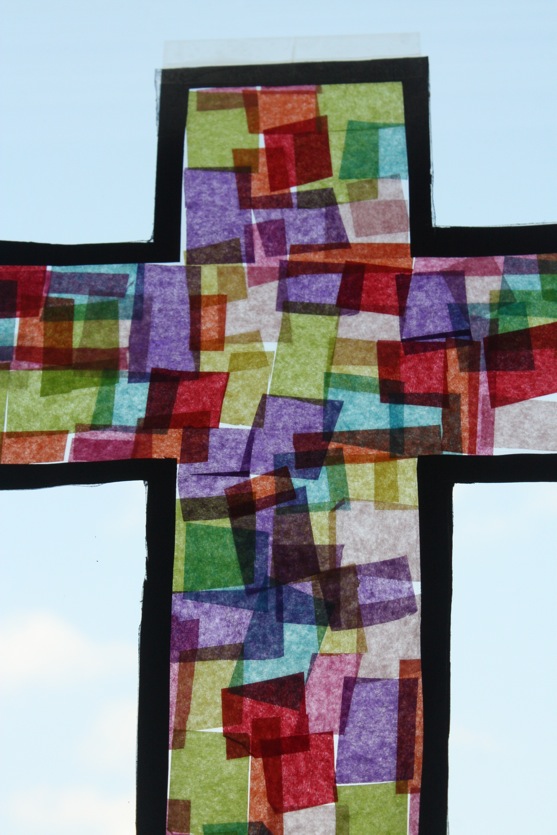
Sun Catcher Crosses

*This is pretty much the same thing as above, just in a cross shape instead. Follow the above directions!


Handprint Easter Lillies

You Will Need:

White or yellow construction paper
Green and yellow pipe cleaners
Red and/or pink pipe cleaners
School glue
Scissors
Pencil


Trace the kid's hands on the white or yellow paper. Cut them out. Curl the tips of the fingers by wrapping them around the pencil. Wrap the wrist part of the hands around the green pipe cleaner and glue. Cut the yellow pipe cleaners into thirds and curl the tops into a "curly-q". Apply glue to the bottom of the yellow pipe cleaner and stick down into the inside of the flower. Each child should make a few flowers. Bunch them together and attach with a red or pink pipe cleaner in the shape of a bow!


Toilet Paper Roll Chicks

You Will Need:

Toilet paper rolls (or paper towel rolls cut to length)
Yellow paint
Paintbrushes
Googley eyes
Yellow feathers
Orange paper
Scissors
School glue


Paint the toilet paper rolls. Allow to dry. While the paint dries you can cut out small diamond shapes for the beaks and feet shapes out of the orange paper.
Once the paint is dry, glue on the eyes, beaks, feet, and feathers (for wings). You can also cover the hole in the top with yellow tissue paper, if you wish.


Easter Baskets

You Will Need:

Shoe boxes (or rectangle Kleenex boxes)
Glue
Cardboard or cardstock strips (for handles)
Whatever you wish to decorate with, such as:
tissue paper, markers, stickers, glitter, cotton balls, craft poms, construction paper, pipe cleaners, ribbon, etc


These are really fun! The kids can be totally creative and make them however they like.

To start, glue the strip of cardboard (you can also staple them to make them more sturdy) in an arc over the center of the box. From there, provide many different craft accessories and glue and let the kids go to town.

Once complete, you can stuff them with Easter grass and jelly beans. :)


Tape Resist Easter Cross
These turn out so beautiful and are really easy, even for the younger kiddos!

You Will Need:

Large sheets of paper
Painter's tape
Paint (you can use any kind you wish)

Tape off the cross shape on the paper. Let the kids paint all over the paper however they want! Once the tape is removed, the beautiful picture will emerge.


Handprint Chicks

You Will Need:

Construction Paper (yellow, orange, and whatever color you want the background to be)
Glue
Googly eyes
Yellow or orange pieces of yarn
Yellow and orange Tempura paint
Aluminum pans for the paint
Baby wipes!


You need a large and slightly smaller circle in yellow for the head and body of the chick. You also need a small orange triangle for the beak. Allow the kids to glue the head and body to the background paper. Then glue the beak on the face. Add the eyes. Glue the yarn pieces to the top of the head.

Now for the messy part! Pour the paints into the aluminum pans. You will need 2 yellow handprints for the wings and 2 orange handprints for the feet. Keep the baby wipes handy to clean their hands in between colors. These are super cute!


Borrowed from funhandprintart.blogspot.com


Paper Plate Easter Bunnies

You Will Need:

Paper plates
Googly Eyes
Pink craft poms
Cotton Balls
Pink construction paper
School Glue
Scissors


To Make The Ears:
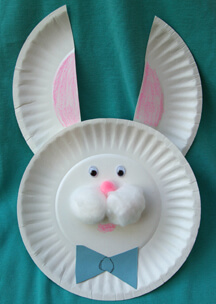
Cut a paper plate in half. Cut a "half moon" of pink paper for each ear. Glue it the inner edge of each ear.

To Make The Head:
Glue 2 cotton balls side by side in the center of the plate. This will be the bunny's mouth area. Glue a pink pom between and above the cotton balls for the nose and another pink pom between and below the cotton balls for the mouth. Glue on the eyes where appropriate. Glue the ears to the top of the head, on the back of the "head" plate.

You can add cute bowties, pipe cleaner whiskers, or any other embellishments you wish!


Empty Tomb Biscuits - Resurrection Buns

Whatever you call them, these are easy and fun to make and are fantastic for Easter brunch!

Ingredients:
Refrigerated crescent dough
Bag of large marshmallows
½ cup of butter, melted
¾ cup of sugar
2 TBSP cinnamon


Pre-heat oven to 350º and grease a regular sized muffin tin.

Mix the cinnamon and sugar together in a small bowl and also put the melted butter in another small bowl. Separate the crescent dough into triangles and lay flat. Place a marshmallow in the center of each. (the marshmallow represents the body of Jesus) Wrap the dough around the marshmallow completely and press the edges to seal. (this represents burying Jesus and sealing him in his tomb) Roll the balls in your hands to make them smooth. Dip each ball in the melted butter and then in the cinnamon sugar mixture. Place each completed biscuit in a muffin tin compartment. Bake in a 350º oven for around 15 minutes. Allow to cool a couple of minutes before trying to remove from tin.

While they are cooling you can read Matthew 28:1-6. Then open your "tomb" and see that "Jesus is not here! He is risen!"


Great Books for Dr. Seuss's Birthday Week!


Dr. Seuss wrote some pretty awesome books that kids really love! They are funny and silly and keep kid's attention by using rhyme. They also often times have a great life lesson within the silly-ness. I love his stories and have a great many of them in our home library! Here are some of our favorites!


(Below taken from "The Grown Up's Guide to the Best Children's Books" at http://www.best-childrens-books.com/dr-seuss-books.html#seuss-messages)


Theodor Geisel published his first children's book as Dr. Seuss in 1937.
He became a successful children's book author in the early going, but there wasn't much money in it, and his main income came from the advertising field.
In the mid-1950s, America was in a panic about falling reading scores. Early Readers, those Sally, Dick and Jane books, were being blamed - for being boring!
A 1954 Life Magazine article detailed the decline and called personally upon Geisel to write and illustrate Early Readers that would hold children's interest.
Geisel took up the challenge. With a stingy palette of barely more than 200 Early Reader words, The Cat in the Hat took him about a year and a half to create. The world of children's books has never been the same.


"Horton Hears A Who"
"The King will reply, 'Truly I tell you, whatever you did for one of the least of these brothers and sisters of mine, you did for me.' (Matthew 25:40)

Dr. Seuss was Jewish, but I read this and felt that it went right along with the lesson in this book.


This is an enchanting story about a great elephant who somehow hears the tiny voices of an entire community on a tiny puff-like flower. He realizes that it is up to him to make sure that no harm comes to the tiny beings on the flower, even though everyone around him refuses to believe that they are there. They call him names, treat him poorly, and even threaten him because of his belief in the beings that no one can see. Sound familiar? This is a great read and has a fantastic lesson associated with it.

“Should I put this speck down?…” Horton thought with alarm.
“If I do, these small persons may come to great harm.
I can’t put it down. And I won’t! After all
A person’s a person. No matter how small.”

--Horton Hears a Who, 1954


"Yertle the Turtle - and other stories"


Yertle the Turtle - I can't think of a more appropriate story for young children. This book has been banned in several countries (even Canada had toyed with the idea) because it simply and effectively explains why totalitarianism (or even being a bossy friend) seems like fun, but everyone who isn't in charge isn't having any fun and they will eventually fight back! Yertle, the turtle king only seems to have 2 emotions, happy and angry. He is happy when he is getting whatever he wants and he is effectively bullying the other turtles into doing things for him. He gets very angry when one of the turtles questions him and asks that Yertle stop bossing him around. Kids, especially only children, must learn this lesson! Dr Seuss does a great job of explaining why with this story.

"Your majesty, please...I don't like to complain,
But down here below, we are feeling great pain.
I know up on top you are seeing great sights,
But down at the bottom we, too, should have rights."~Mack the Turtle


Gertrude McFuzz - This story explores jealousy and the terrible things that can happen when you aren't just happy with yourself for the way you are! Gertrude decides she wants more tail feathers, like another girl bird she saw. Her single tail feather isn't good enough. So she goes to a doctor who gives her a pill and she way over does it. Once she has a whole bunch of new feathers, she finds she cannot fly at all and is now stuck far away from home. Oh no!

And, finally, when all of the pulling was done,
Gertrude, behind her, again had just one...
That one little feather she had as a starter.
But now that's enough, because now she is smarter.


The Big Brag - Is it ever a good idea to brag about being better than someone else? Not really, and here is why! This story talks about being humble and realizing that each of us have our own special talent. We should be proud of what we can do, but we should also be proud of the things our friends can do as well!

And I kept right on looking and looking until
I'd looked 'round the world and right back to this hill!
And I saw on this hill, since my eyesight's so keen,
The two biggest fools that have ever been seen!
And the fools that I saw were none other than you,
Who seem to have nothing else better to do
Than sit here and argue who's better than who!

How's that for a well-written (and well-deserved) insult!


"Green Eggs and Ham"


This book is just so silly! The rhythms of the rhymes really make this book fun, as well as the funny ways that green eggs and ham could be eaten! The lesson here is awesome, too! This guy just won't give up on trying to have his friend try these green eggs and ham. The idea is to never decide you don't like something until you have tried it. You may be missing out on something pretty great!

Another thing that makes this book so great is that it is a great First Reader for your kids! With the repetitive words and the rhyming, it is a fun book to read for those just starting out.

“I do not like green eggs and ham. I do not like them, Sam-I-Am.”
“Try them, try them, and you may! Try them and you may, I say.”


"The Cat in the Hat" AND "The Cat in the Hat Comes Back"


Honestly, what do I have to say about these classics? I always feel so overwhelmed by this Cat when he is tearing everything up. But I guess that is the point! Sometimes it is easy to get caught up in wrong-doing when there is a new person, full of confidence, doing things that you would never have the guts to do alone. These are fun books to read and are full of lessons!

These books were also meant to be early readers! Kids who are learning to read will have a lot of fun learning to read these books.

“And this mess is so big
And so deep and so tall,
We cannot pick it up.
There is no way at all!”


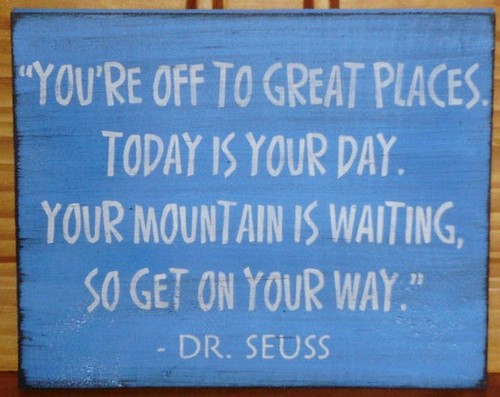
"Oh The Places You'll Go!"


A book all about your child's future! What could be better than to help inspire young children to think big about where their future will take them? The concept is simple, but Dr. Seuss made it silly and fun! This story makes kids think about how big the world is, and that the whole thing is opened up wide for them to go do amazing things! SO awesome!

"You'll look up and down streets. Look 'em over with care.
About some you will say, "I don't choose to go there."
With your head full of brains and your shoes full of feet,
you're too smart to go down any not-so-good street."


"Mr. Brown Can Moo, Can You?"


This one is just plain fun! Read this one with a crowd, it makes it even more silly! You read the silly sound words, then have the kids repeat them. So fun!


"There's a Wocket in my Pocket!"


I LOVE reading this book! It is so silly and so fun that you will have a hard time not smiling while you read it! Bring this one out when you have an unhappy child and you may just turn their frown upside down!


"Hop On Pop"


This is the BEST book ever for teaching a kid to read! There are few words and they all rhyme! Also, the story is fun. What could be better?

The front cover features words for phonics practice! The words get harder as the book goes on so it allows for lots of learning! Good stuff...


Dr. Seuss made a great mark on the world with his wonderful rhyming stories that grow with us. So celebrate his birthday this week by reading some of them to your kids! Have fun :)